To control 1 specific unit on a site
The actual status (ON/OFF) of a unit is shown in the equipment list tiles.
Instead of modifying the settings of all units at a particular site you can modify the same settings of 1 particular unit.
The settings of the specific unit overrule the general settings.
1 | From the site selector, select the site of the unit you wish to manage first. |
2 | In the navigation pane, select under . |
- Result: A list of all available units at the particular site appears.
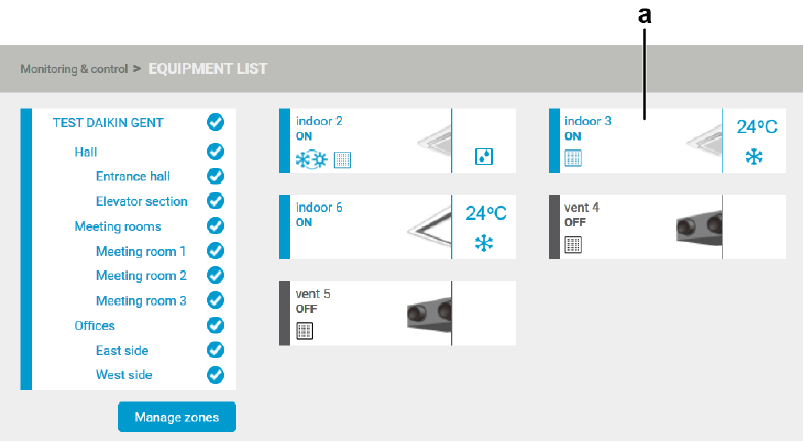
3 | Click 1 specific unit (a) in the equipment list window. |
- Result: The following section appears.
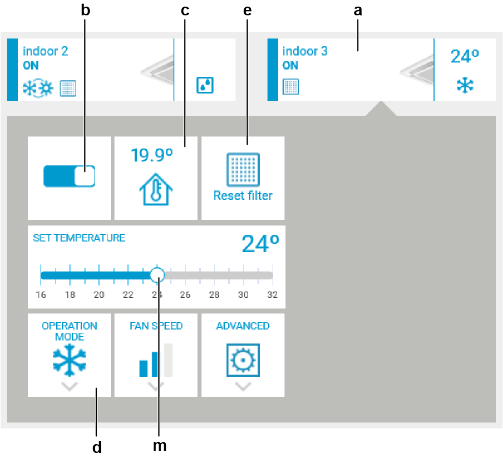
4 | Switch the unit on or off by sliding the ON/OFF button (b) to the corresponding position. |
If the unit is OFF you can still modify the value (m) and open the menu (d).
5 | Monitor the measured indoor temperature (c). |
The icon (e) will only be visible when the unit triggers that it is necessary to reset the filter.
6 | You can register the replacement of a filter by clicking the icon (e). Click in the confirmation message that appears. |
- Result: The button disappears from the option list.
7 | Drag the slider (m) to set the temperature. |
8 | If applicable for the unit, click the menu (d). |
- Result: The following section appears. Depending on the type of unit, the options might differ.
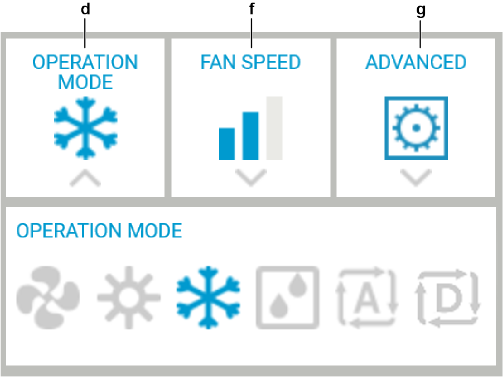
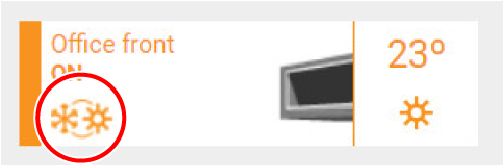
9 | Choose the operation mode. The options are fan, heating, cooling, dry, automatic and dependent. |

You can only switch to heating, cooling, and automatic modes on a master of mode unit. You can recognize a master of mode unit by the combined heating and cooling icon.
Units that are on dependent mode will follow the operation of the master unit.
10 | If applicable for the unit, click the menu (f). |
- Result: The following section appears.
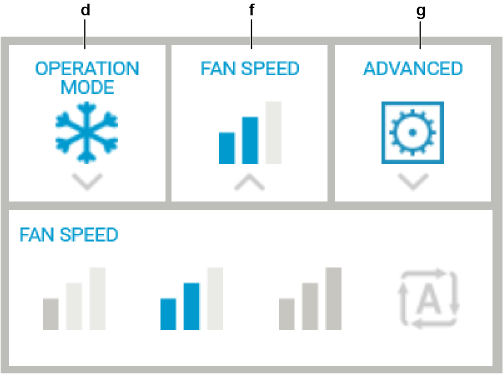
11 | Choose the fan speed. The options, depending on the unit, are , , and . Some units may only show and . |
12 | Click the menu (g). |
- Result: The following section appears.
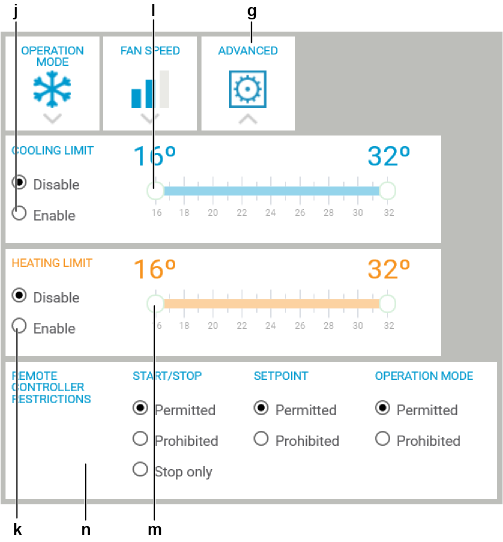
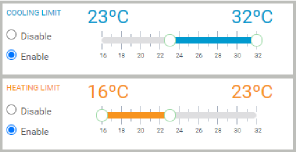
13 | Select the corresponding option (j) if you want to set a value. |
14 | Drag the slider (k) to set the maximum and minimum limit of the cooling setpoint. |
15 | Select the corresponding option (l) If you want to set a value. |
16 | Drag the slider (m) to set the maximum and minimum limit of the heating setpoint. |
Daikin recommends for most installations to set maximum and values both to 23°C.
Limiting the maximum cooling and heating temperatures avoids extreme settings and the resulting high energy consumption.
17 | Choose the functions you want to permit or prohibit on the remote controller in the section (n). |
Example: If you do not want users to turn off and on any of the units, set the start/stop option to . If you want to allow them to switch between heating and cooling, set the operation mode to .
18 | Close the control window by clicking the unit. |
- Result: All the new settings are implemented.
