To create a yearly time schedule
You can create one or more schedules for different periods of the year.
Within these schedules all settings as described in About controlling all units of the chosen site can be modified.
The schedule settings are overruled by controlling actions executed directly on the management point or through the other controller features on the platform.
1 | In the navigation pane, select under . |
- Result: The following page appears. Current schedules (a), if any, are displayed at the right of the calendar.
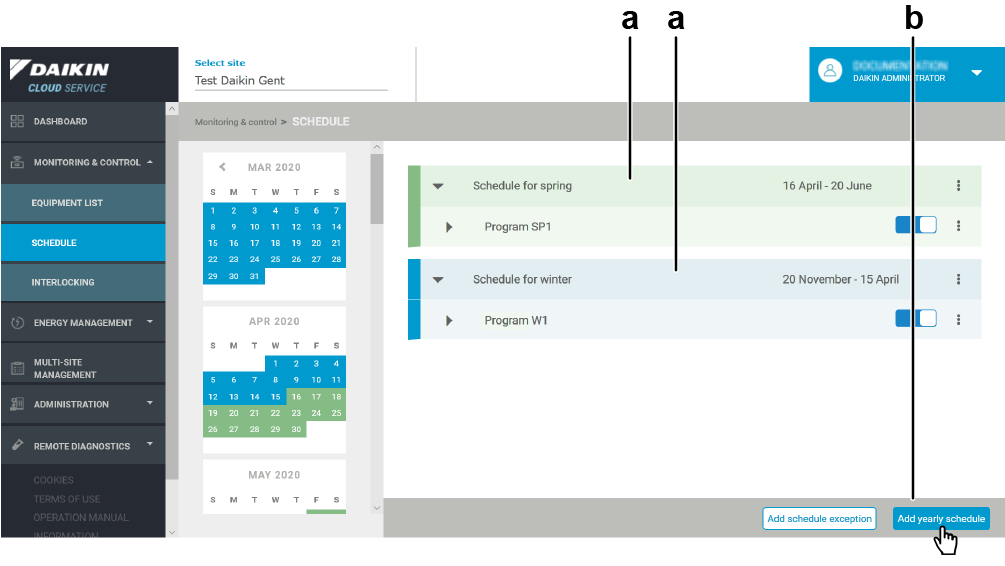
2 | Click the button (b). |
- Result: A new line is added.
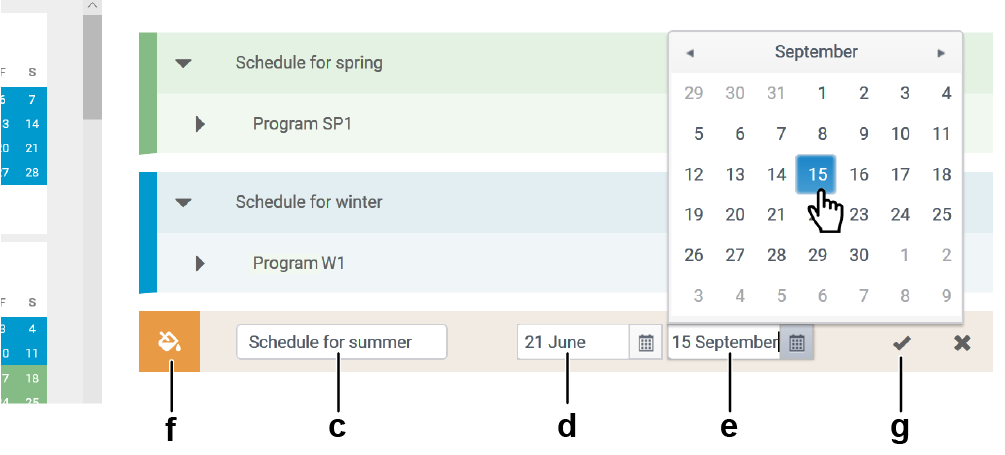
3 | Fill out a schedule name (c) and select the start date (d) and the end date (e). |

4 | If desired, you can assign a color to the new schedule by selecting one from the hover-over list (f) at the left. |
This color will be used in the calendar in the left part to indicate the period of the schedule.
5 | Click the check mark (g). |
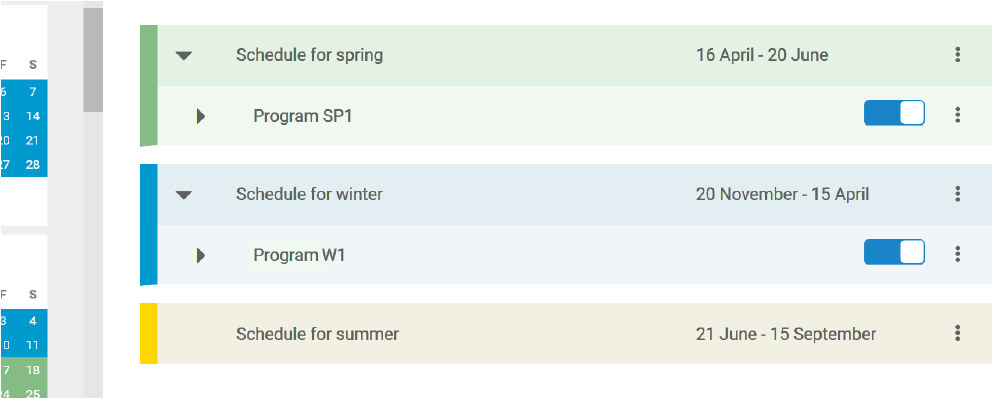
- Result: The schedule is created.

The start date and the end date do not apply to a specific year.
The start date and the end date of schedules can NOT overlap.
If you do attempt to make a new schedule with overlapping dates (h), a warning (i) appears and you cannot complete the action.

