To link an event to a responding action (interlocking)
Linking an event to a responding action () allows you to set up the triggering of a responding action after an event. This responding action can be applied to a choice of units. The trigger can be initiated by a management point, a sensor, or a combination of both.
For example: You can link the closing of the digital input "burglar alarm" to the switching off of all heating/cooling units. The contact of such an alarm is active once the entire staff has left the building, making it no longer needed to keep all heating/cooling units on.
1 | In the navigation pane, select under . |
- Result: The list of current items appears.
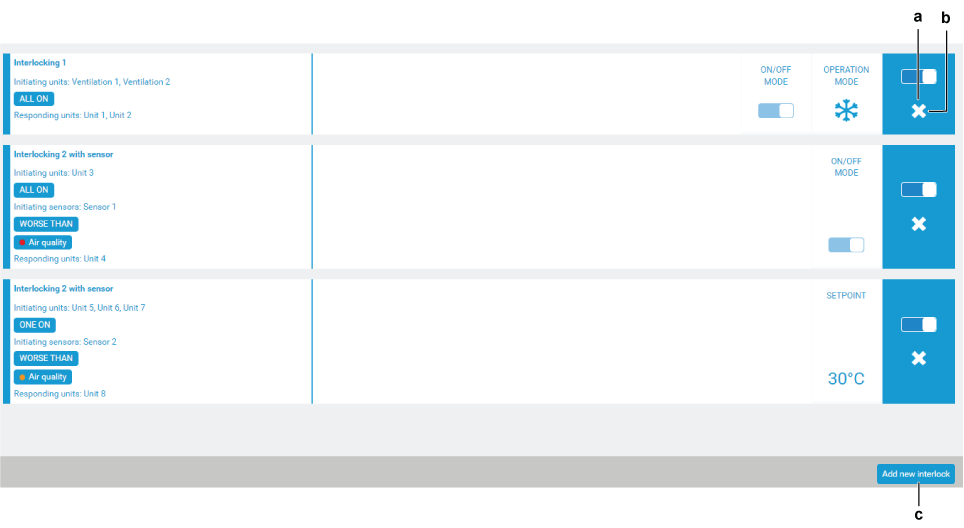
You can (temporarily) deactivate an setting by clicking its slider (a). The slider will become greyed out.
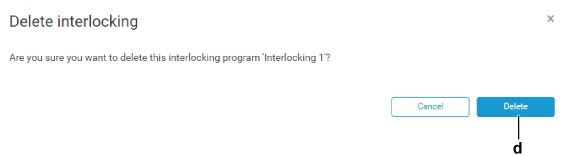
You can delete an setting by clicking the white cross (b). Confirm by clicking (d) in the pop-up window.
2 | Click (c). |
- Result: The menu appears. The menu allows you to set the on the left side of the menu before setting the responding actions on the right side.
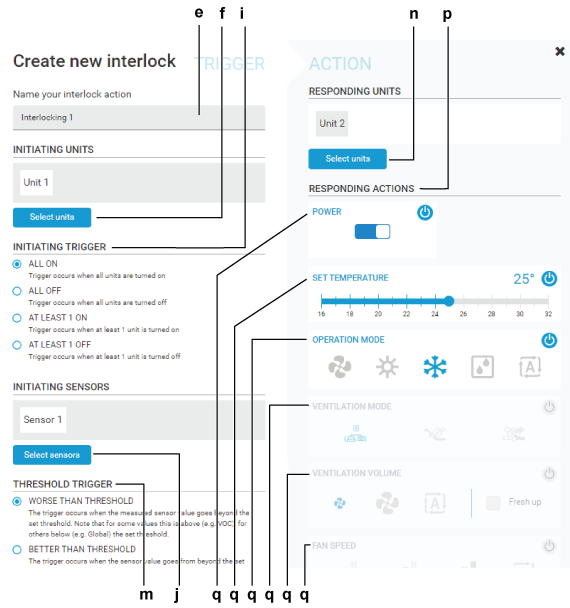
3 | Name the action by filling in the field (e). |
4 | Click (f) in the section. |
- Result: A window showing all connected units (g) that can be linked is shown.
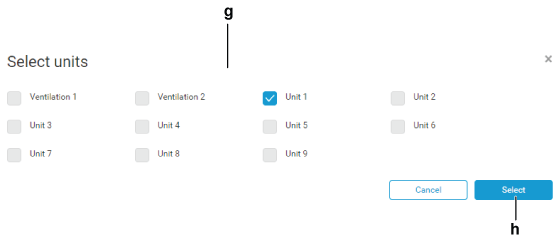
5 | Mark the check box for the initiating unit and confirm your selection by clicking (h). |
6 | Under (i), select when the trigger should occur. |
For example: For the triggering of a fire alarm you can set up that all units need to be stopped when the fire alarm is activated. If you select , you indicate that all selected units need to be turned on in order to execute the trigger command. The opposite is valid when is selected. Similarly, you can choose to set up a responding action only when at least a single unit is turned on or off by selecting or respectively.
7 | Optionally, to add an initiating sensor, click (j) under . |
- Result: A window showing all connected sensors (k) that can be linked is shown.
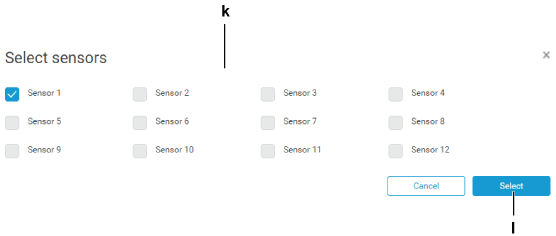
8 | Mark the check box for the initiating sensor and confirm your selection by clicking (l). |
9 | Under , select which values and which type of threshold should trigger the responding action. It is possible to select multiple types of values. For more information about the sensor values and thresholds, see To perform sensor monitoring. |
10 | Under (m), select when the trigger should occur. |

Depending on the selected sensor values, can mean that the trigger can occur either when the value exceeds (e.g. for ) or drops below (e.g. for ) the set threshold. For , the opposite is valid.
11 | In the section, click under (n). |
- Result: A window in which you can choose the units that will respond to the defined actions is shown.
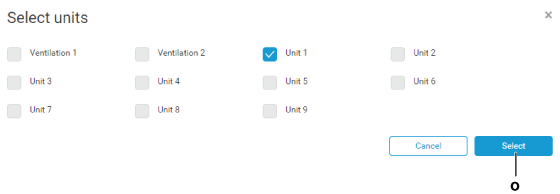
12 | Mark the check box for the responding unit and confirm your selection by clicking (o). |
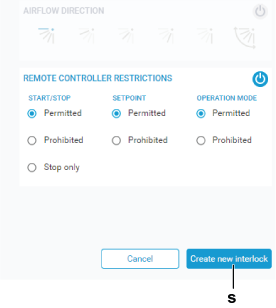
13 | Under (p), define the actions the responding units should perform when a trigger occurs. |
You can enable or disable different types of actions (e.g. or ) by clicking the power icon for each action type (q). Currently disabled action types are greyed out. Hovering over the options of an action type will display more information about the option.
Depending on the unit that was selected under , different types of may be available.
14 | Click (s) to save the interlocking. |
- Result: The interlocking is created.
You cannot change the interlocking name, action or trigger of an interlocking. The only way to change them is by deleting the interlocking entirely and creating a new one.
